


 Explained")


")


FreeNAS is one of the most popular open source software/operating system for Network-Attached Storage (NAS). It can let you transform an old computer into a useful private file server or media center in your home. In this guide, we will teach you how to install FreeNAS on your machine.
We have created a new guide for the latest TrueNAS CORE 12 installation.
Basic Requirements
At the very first, you will need to make sure your computer is meeting the minimum requirements for FreeNAS.
- 64-bit Processor
- 8 GB of RAM
- A 8 GB boot drive
- A hard disk drive (HDD) or solid-state drive (SSD) for main storage
- An Ethernet port
FreeNAS recommends to have at least 1 GB of RAM for each TB of storage. You should use ECC memory, if the data stored is mission-critical. USB flash drive, HDD or SSD can be used to be the boot drive. It is hard to use Wi-Fi for connection currently, as FreeNAS does not have official support for any Wireless NIC.
Also, you will have to prepare another USB flash drive (at least 1 GB) to hold the installation media for the OS.
- Use Rufus or other utility software to make the USB flash drive bootable.
- Download the FreeNAS ISO image from the official website
- Run Rufus and select the correct USB drive
Installation Procedures
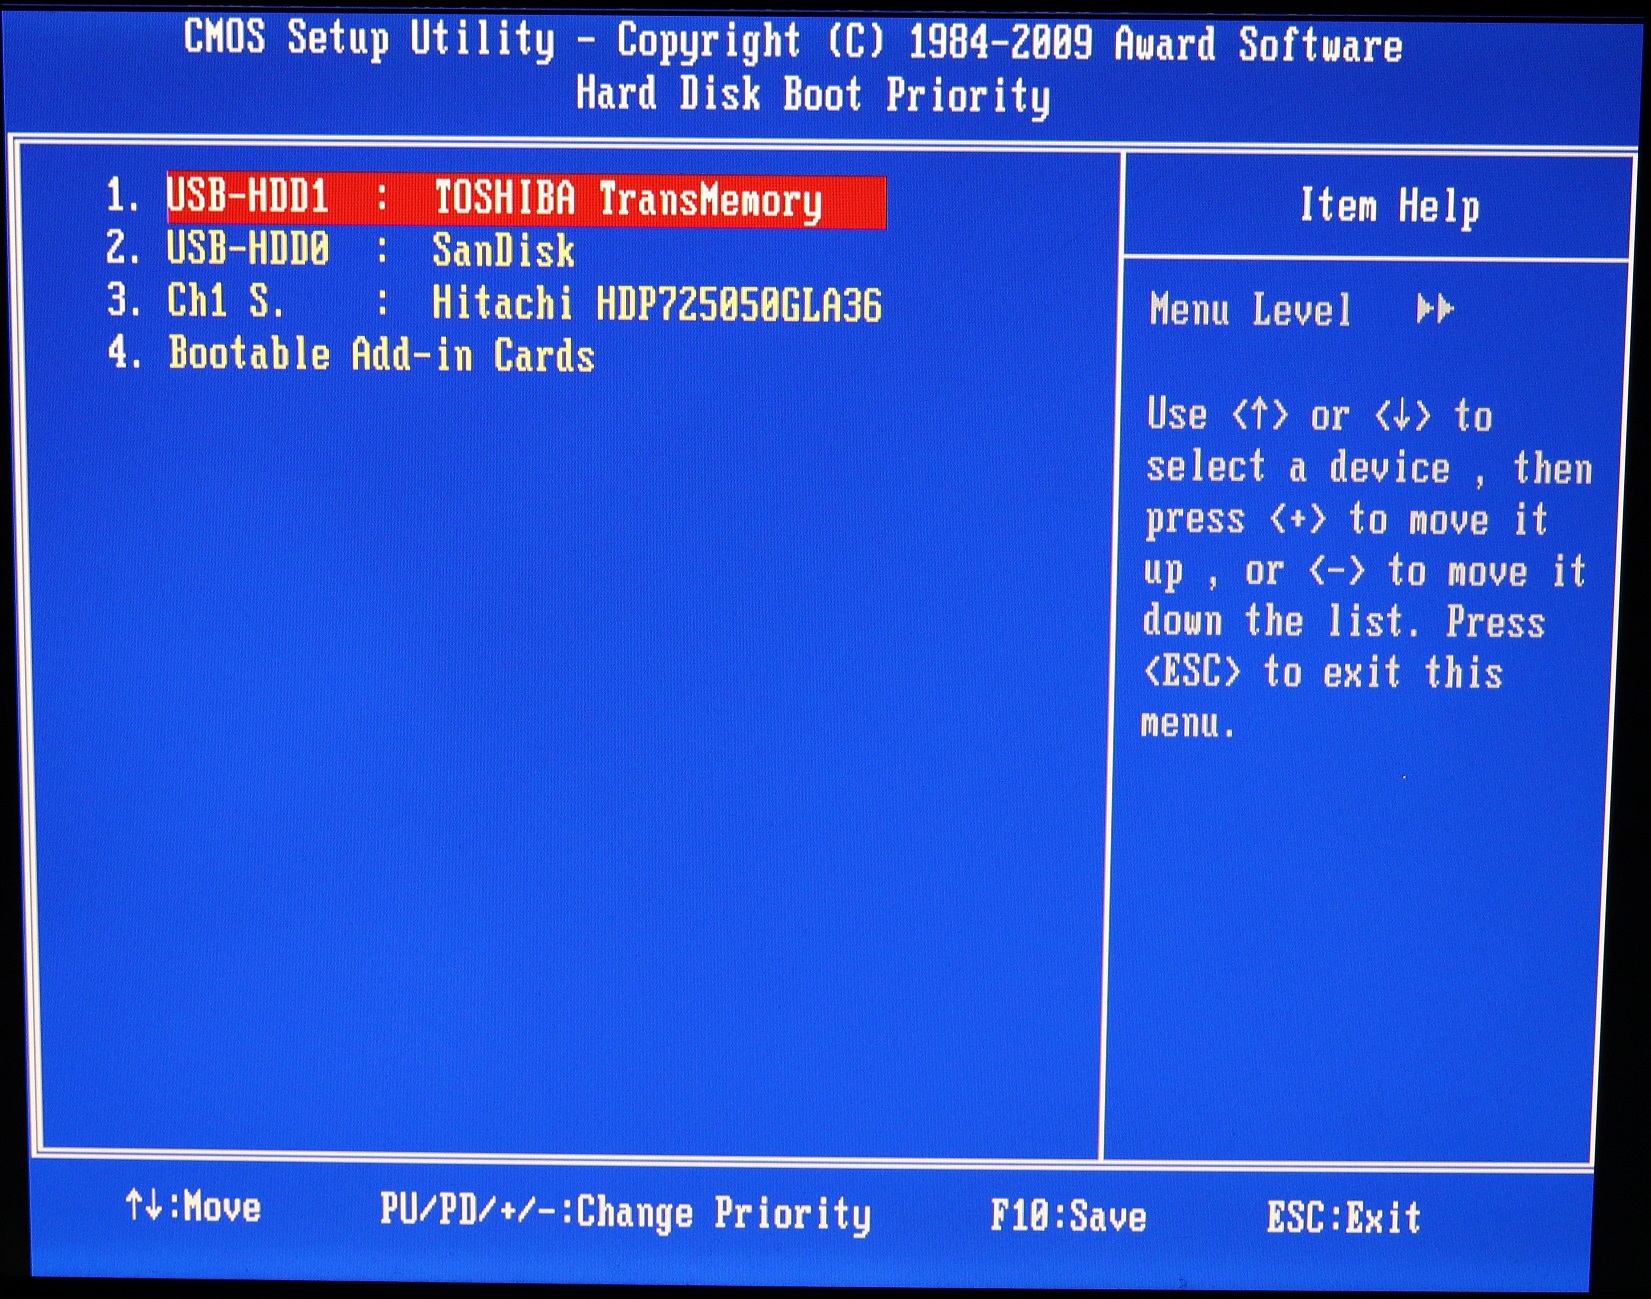
Once everything is ready, press “Delete” or “F2” to go into the BIOS of your motherboard. Visit the particular section for managing storage devices and boot priority. Move your bootable USB to the top (in this case the “TOSHIBA TransMemory”). You should also see your main storage drive and boot drive (“SanDisk”) in the menu. Then, press “F10” to save and restart the system.
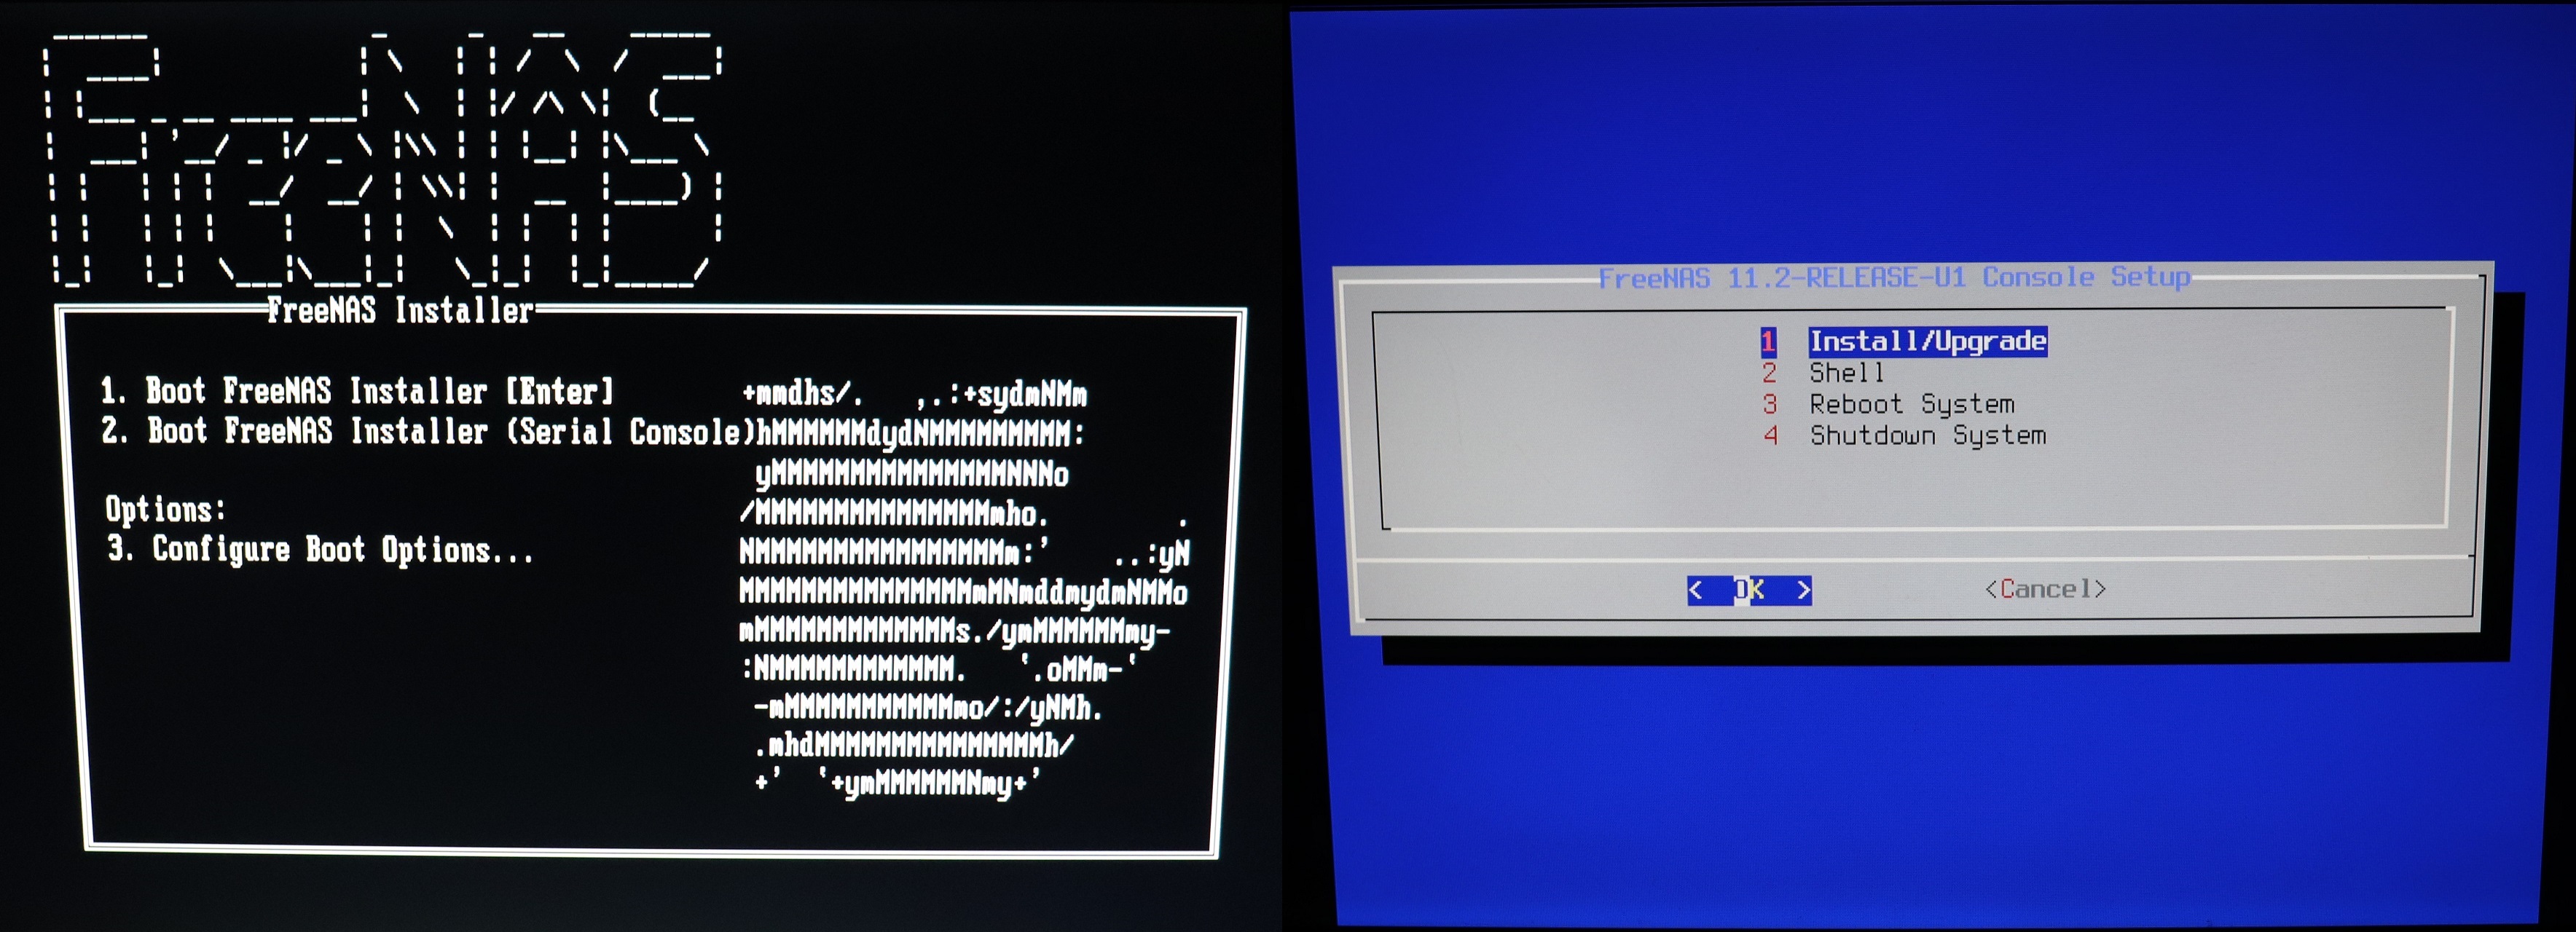
Press “Enter” to boot the FreeNAS Installer. Select “Install/Upgrade” to proceed.
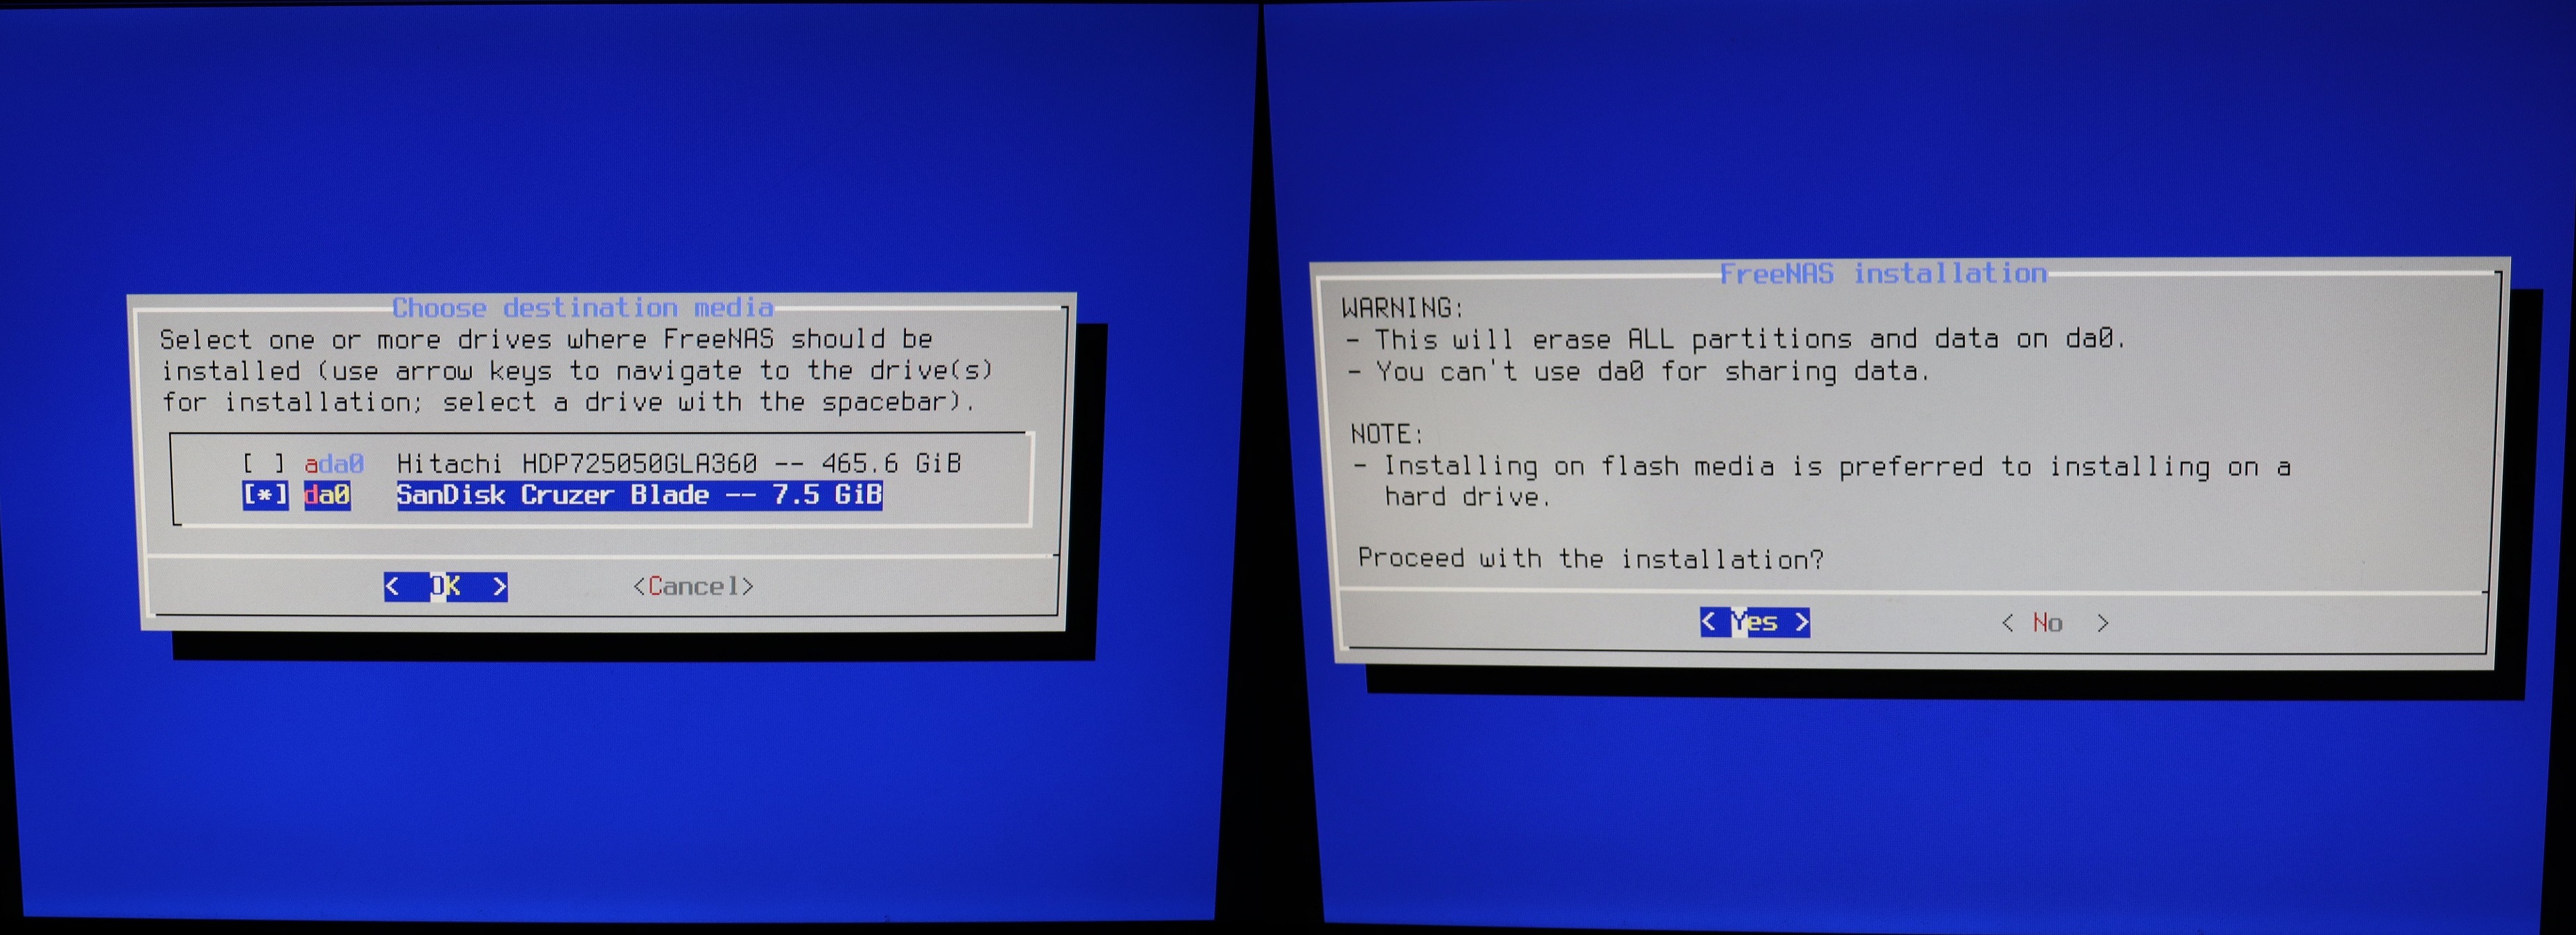
After that, you should see the option to choose the boot drive. Select the correct USB drive or SSD. Press “Yes” to continue the installation. You may be asked to enter the root password. The password will be used to log in to the graphical user interface (GUI) of FreeNAS.
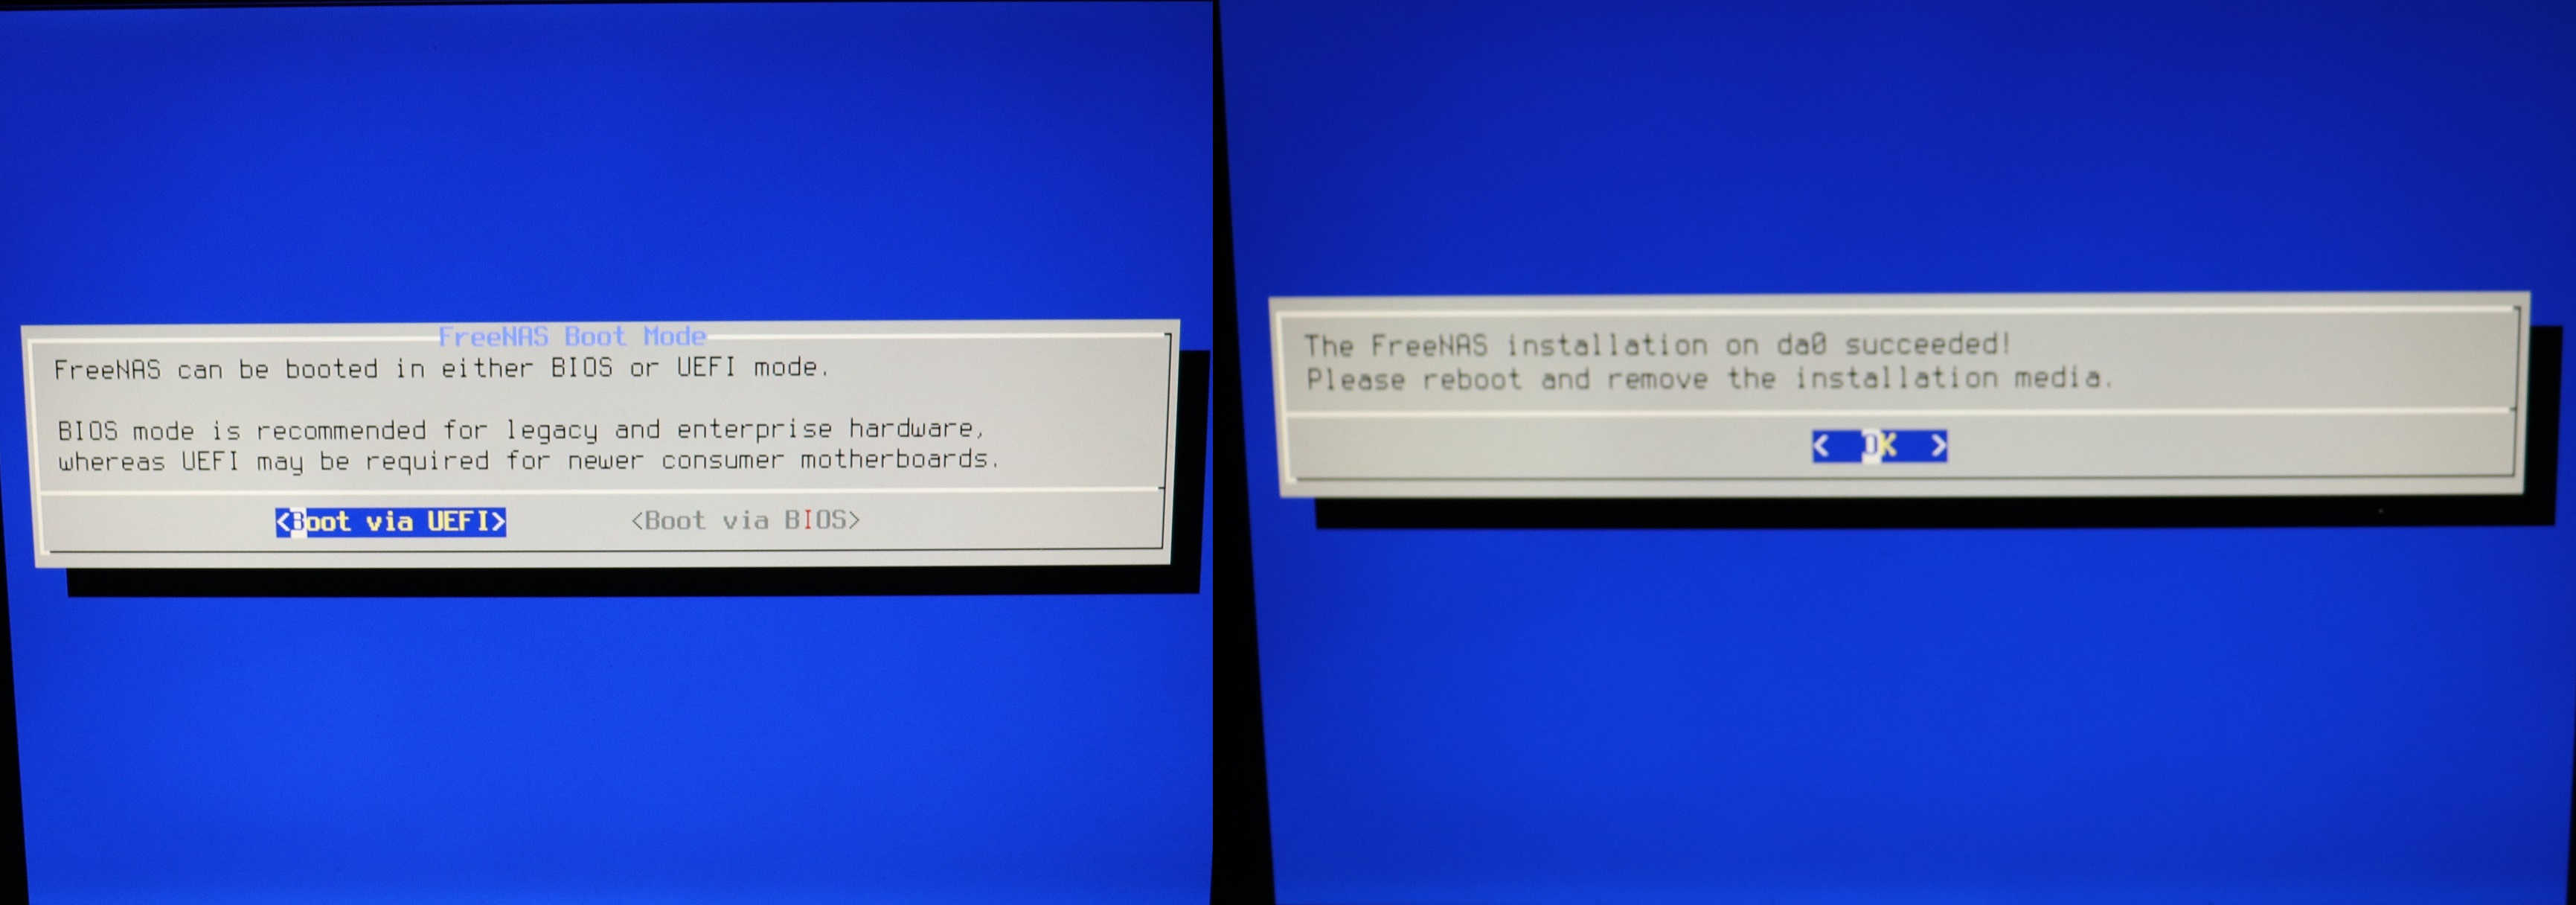
Select to boot via UEFI, if you have a relatively modern machine. Otherwise, choose to boot in BIOS mode for legacy or enterprise hardware. Wait till the installation is completed. A prompt should appear and ask you to reboot the system.
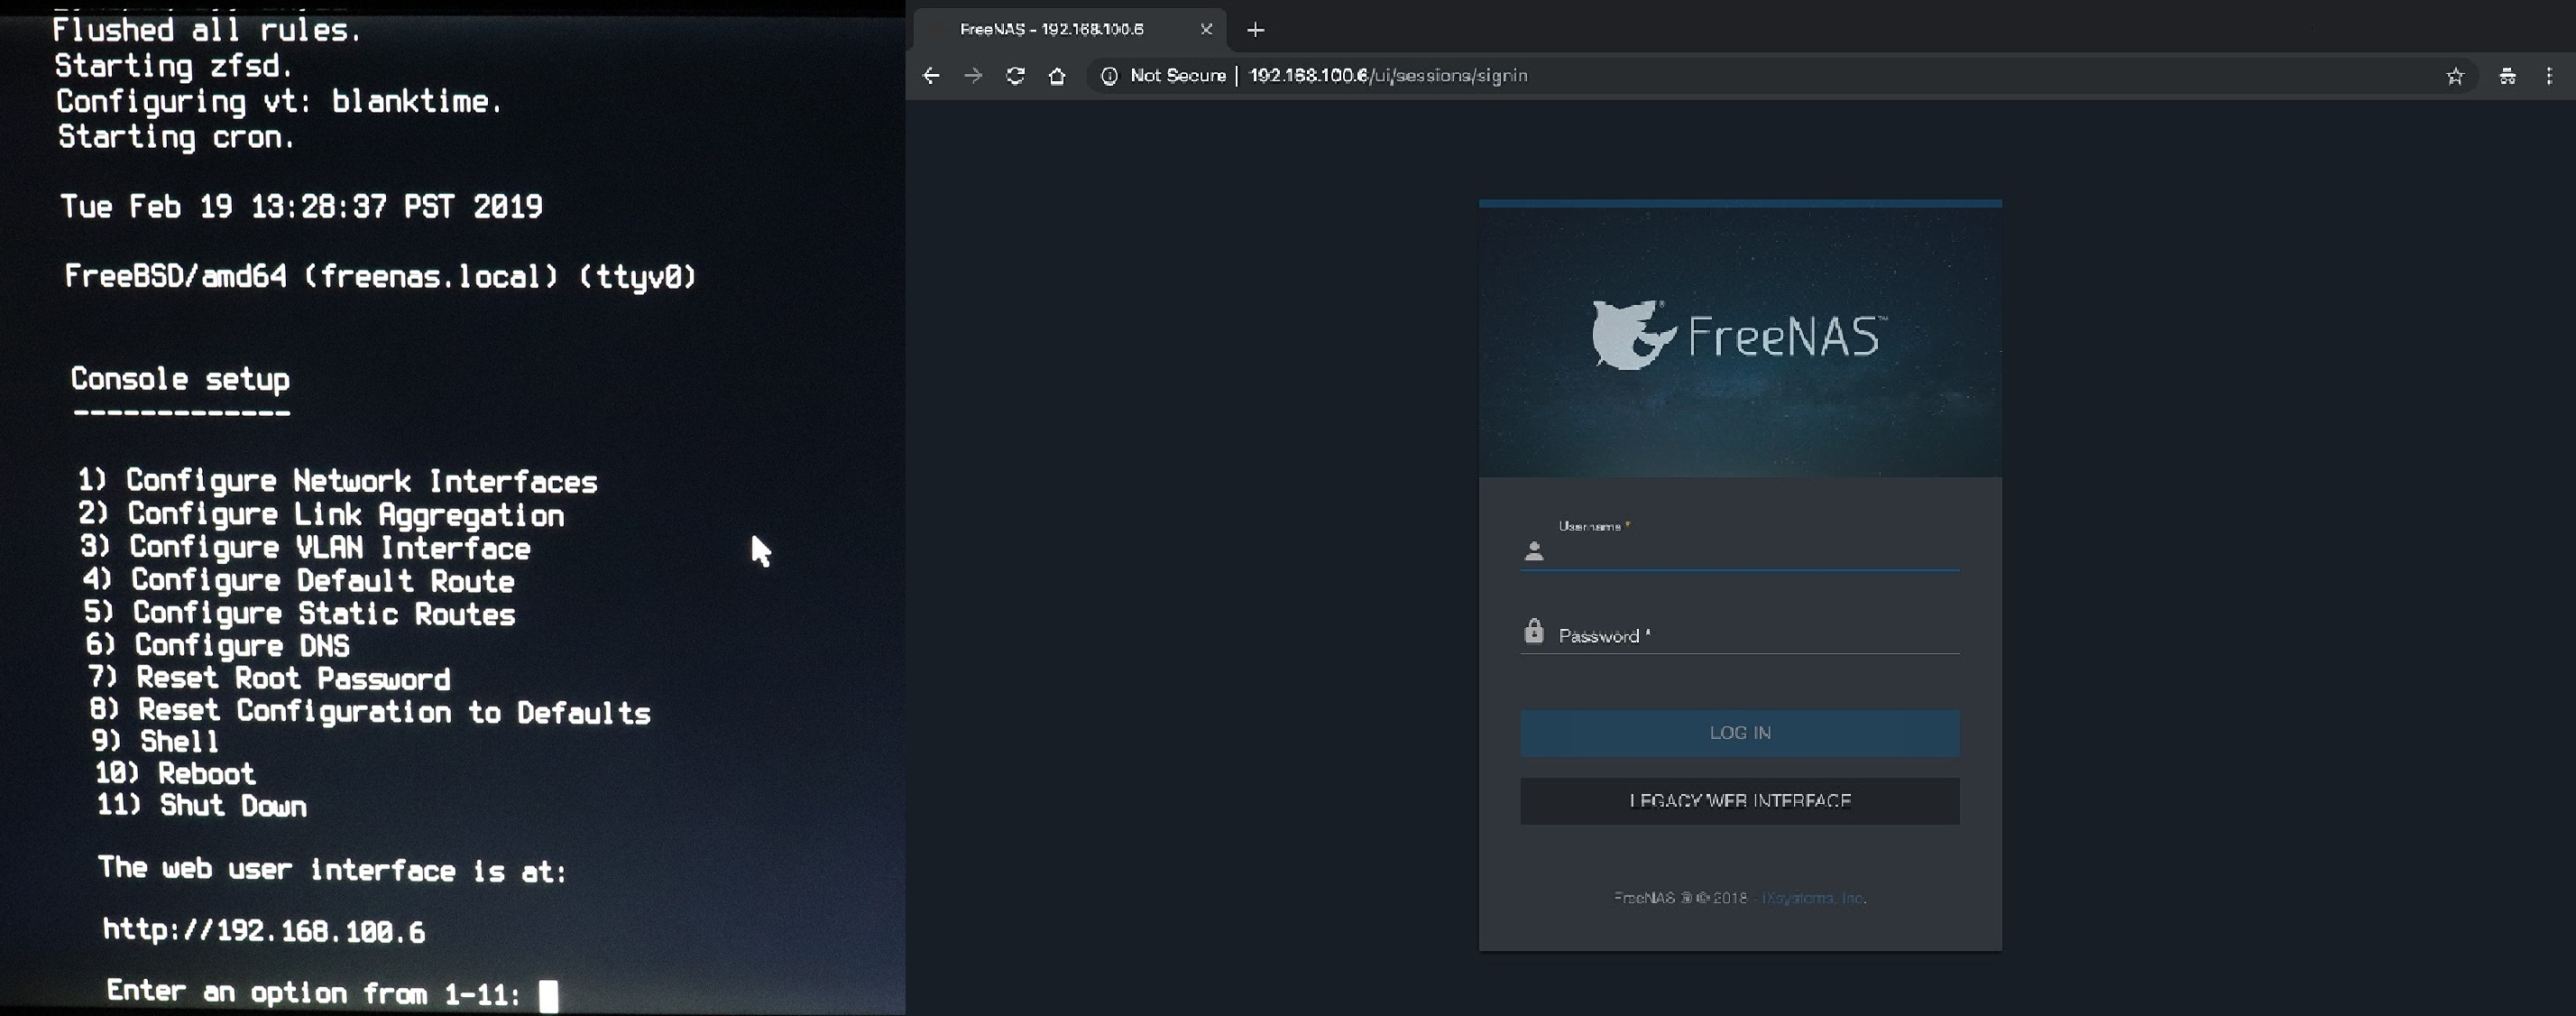
You should see the configuration page on the monitor of the FreeNAS machine, which means the system is booted and operating correctly. You can change settings for the system right here, mostly about networking configurations. A IP address is also clearly stated at the page (in this case is 192.168.100.6).
Now, you can unplug the monitor from the FreeNAS computer. From the client devices in the same local network (192.168.100.x), whether is your desktop PC or laptop, open a web browser and enter 192.168.100.6. You should be able to access the FreeNAS GUI using the root user and password.
In the GUI, you can set up shared folders to store/transfer data between devices easily and conveniently.
Feel free to leave comments below, if you have any opinion about this website. Share the website around if you enjoy reading it. Subscribe to our Newsletter or follow our Google+, Facebook and Twitter.
Support this website simply by shopping in Amazon. It will give us small kickbacks, if you use the above affiliate links to make any purchases, which will help us grow.
