


 Explained")


")


One of the most useful features for a FreeNAS server is the sharing files over the network. In this article, we will teach you how to create a shared folder/drive, that can be accessed from all SMB-supported operating systems (mostly Microsoft Windows).
Before you start, you will have to make sure FreeNAS is properly installed on your server with at least one available hard disk. For reference, Server Message Block (SMB/Samba/CIFS) is a common network protocol for transferring data between different nodes on the network.
Procedures

First, you have to configure a storage pool with one or more hard drives in the server. Unlike creating a virtual machine, you should add a Dataset by clicking the vertical ellipsis menu button (⋮), instead of a Zvol.

Give a easily-distinguishable name to the dataset and remember to choose the “Share Type” as SMB. You can leave other settings as default and click save to proceed.

To use the SMB share later in Windows, you will need to create a user account in FreeNAS. You will be prompted to enter all the details of the account. In our example, the “Full Name” is Test User; “Username” is testuser; “Password” is 123456789. It is recommended to select a more secure password, if you are going to store important or privacy-related data.

- Go to the Sharing section.
- Go to the Windows Share (SMB) sub-section.
- Add a new network share.
- Pick the previously-created dataset from the dropdown menus.
- Enter the desired name for the SMB share, which it will be what you type to find it in Windows.
- Go to the Services section, and make sure SMB is enabled.
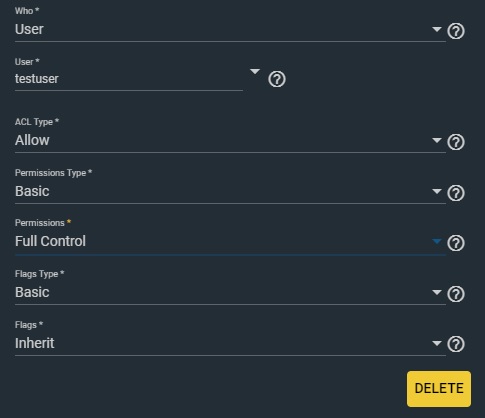
You will also need to change the permission to grant yourself access to the SMB share. Click the vertical ellipsis menu button (⋮) and select “Edit ACL”.
- Add a new ACL item.
- Choose “User” in the “Who” field.
- Select your user account.
- Change the “Permissions” to Full Control.
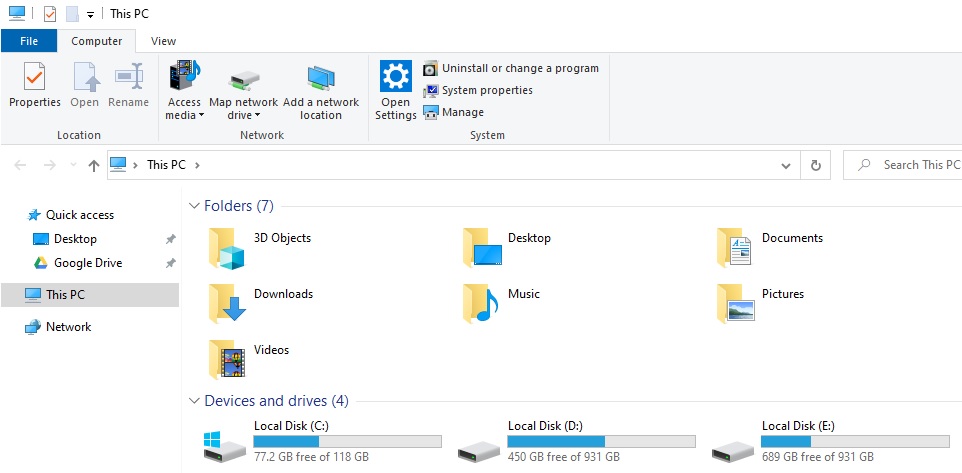
At this point, you can switch back to your Windows computer. Open File Explorer and expand the top menu. You will see the option to “Map network drive”.

Choose the drive letter and type in the location of your SMB share in the box.
\\the IP address of your FreeNAS server\testshare
A pop up will appear to ask your credentials, which are your FreeNAS account’s username and password. If successful, you will be able to read and write files to the FreeNAS server like a normal internal drive in the system.
Feel free to leave comments below, if you have any opinion about this website. Share the website around if you enjoy reading it. Subscribe to our Newsletter or follow our Twitter, Facebook and Instagram.
Support this website simply by shopping in Amazon and Newegg. It will give us small kickbacks, if you use the above affiliate links to make any purchases, which will help us grow.
