A FreeNAS server can do a lot more than only storing and sharing files over the network. If you have a decently-powered machine, you can take advantage of the free resources via virtual machines, instead of leaving them at idle. In this article, we will guide you through creating your own VM in FreeNAS.
Basic Requirement
A virtual machine (VM) is emulated on top of the actual hardware, that acts as a separate computer. You can install multiple and different operating systems into a single physical machine. bhyve, or BSD hypervisor, is used to provide the feature in FreeNAS. Not all processors are compatible with bhyve, but you can check if yours will work using Shell.
- AMD: grep POPCNT /var/run/dmesg.boot
- Intel: grep VT-x /var/run/dmesg.boot
Type the above command in Shell. Make sure the features POPCNT (AMD) or EPT and UG (Intel) are listed.
Also, you will have to download an ISO image file of your operating system of choice. You can install basically any OS to the virtual machine, whether it is Windows or Linux. We are using elementary OS 5.1 as an example in this particular guide.
Installation Procedures

First of all, a dedicated storage space will need to be allocated for the virtual machines. You should have already created a storage pool from one or more drives for file-sharing over the network. Add a new Zvol (ZFS volume) to the preferred pool by clicking the vertical ellipsis menu button (⋮).
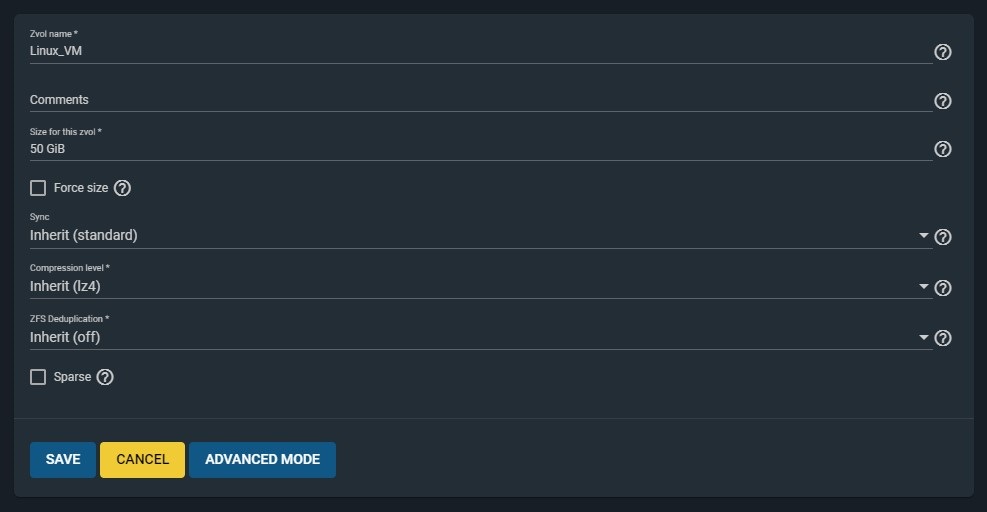
Specify the size of Zvol, after giving a name to it. Make sure the disk is larger than the minimum requirement of your installed OS. For example, Microsoft Windows 10 and Ubuntu Desktop will need at least 32 GB and 25 GB respectively.
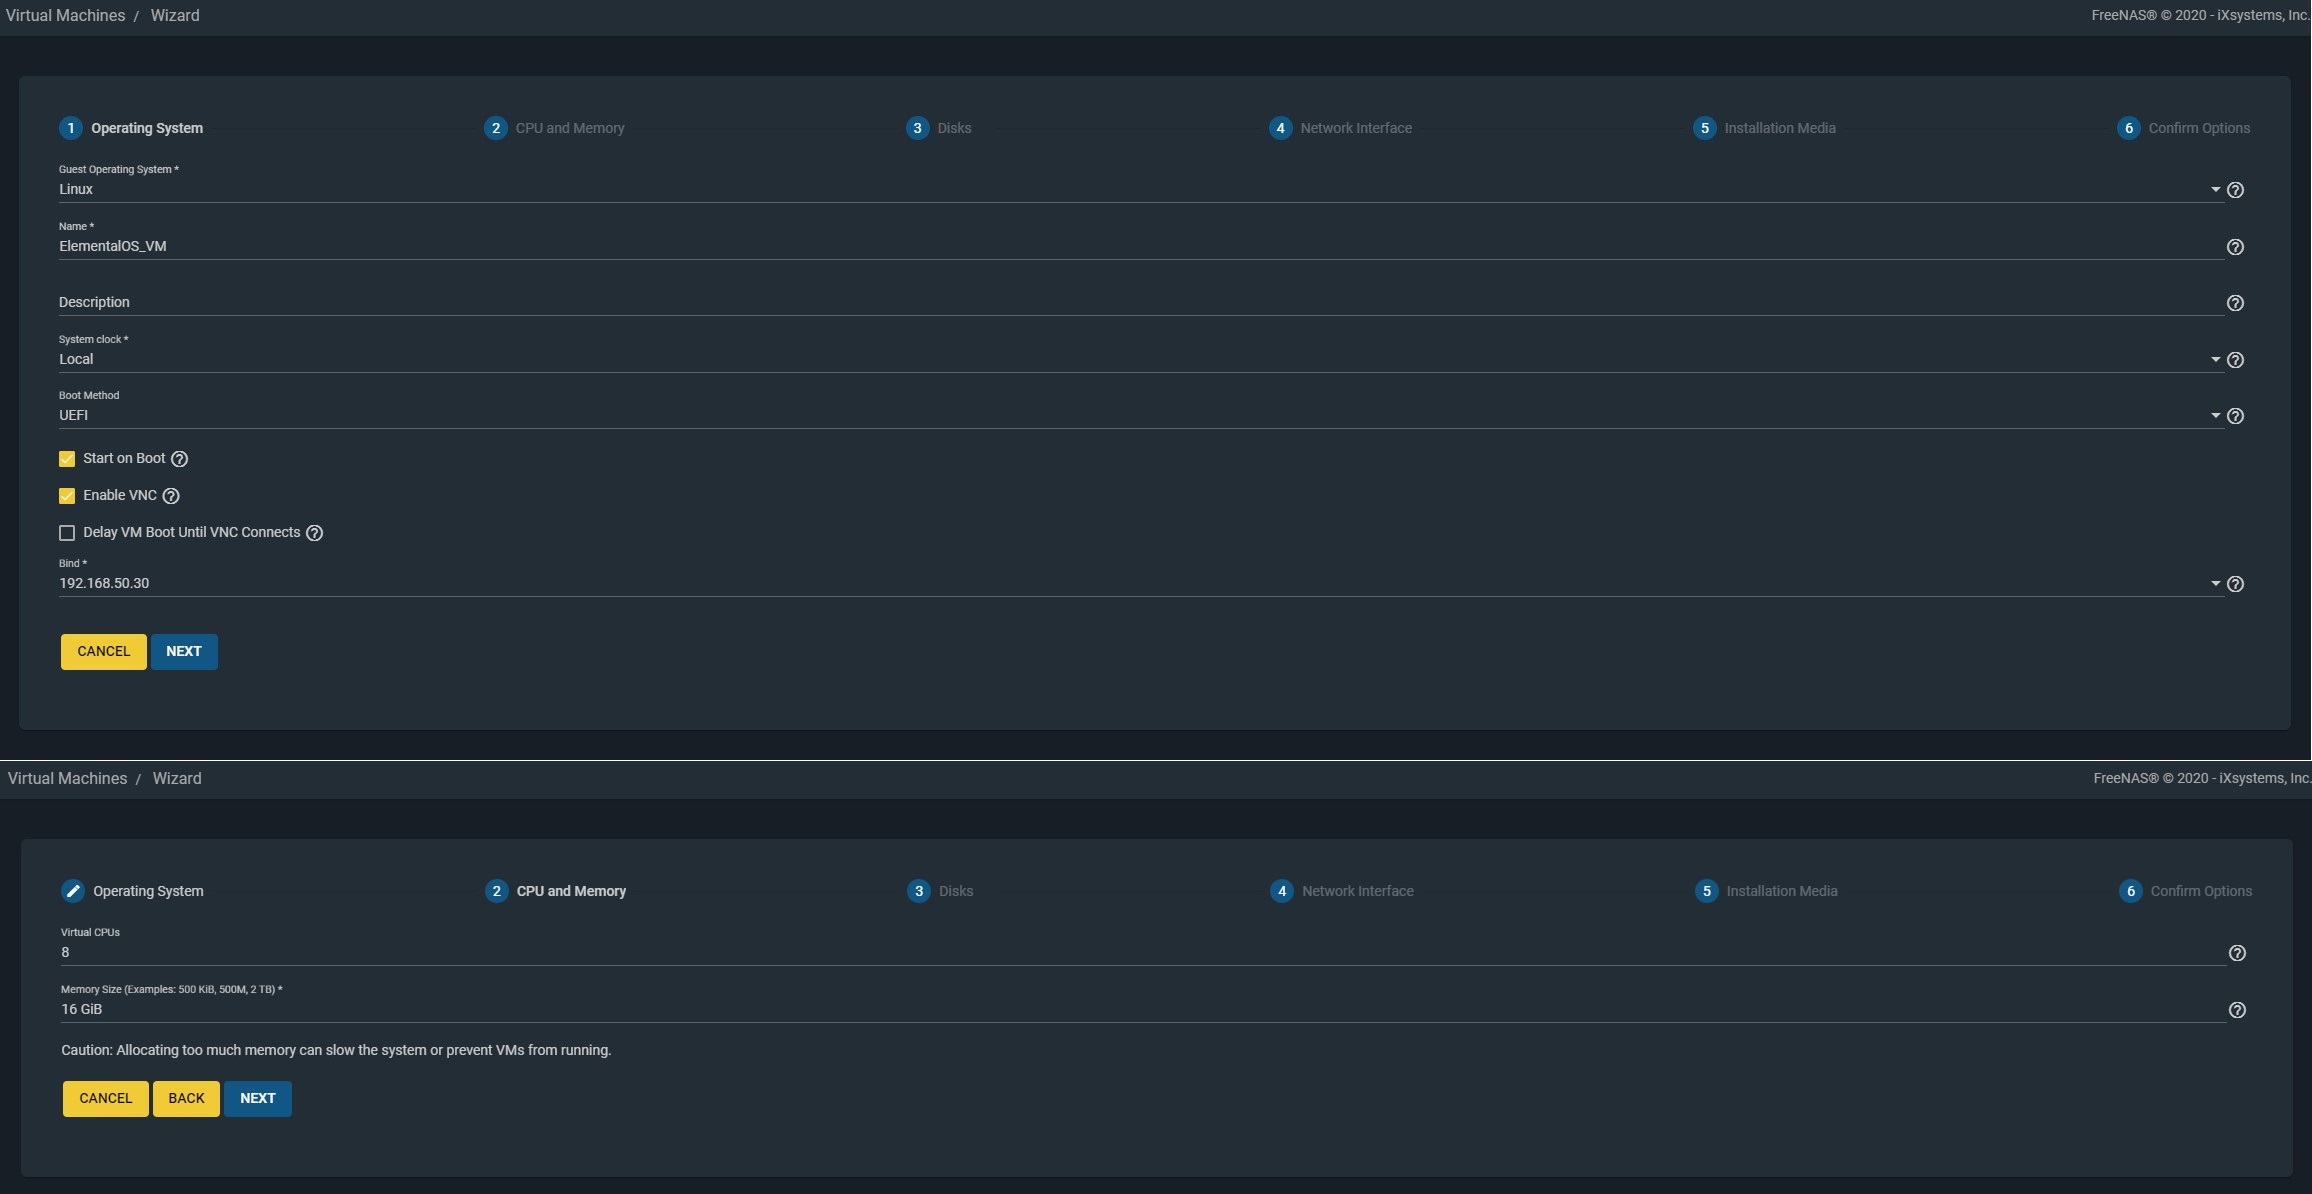
- Go to the “Virtual Machines” section and click “Add” to create a new VM.
- Pick the “Guest Operating System” between Windows, Linux and FreeBSD.
- Name the VM and type in a description.
- Uncheck the “Start on Boot”, if you want to manually start the VM every time.
By default, the VM will use the same IP address as your FreeNAS server. You can choose a different interface if it is available to the machine.
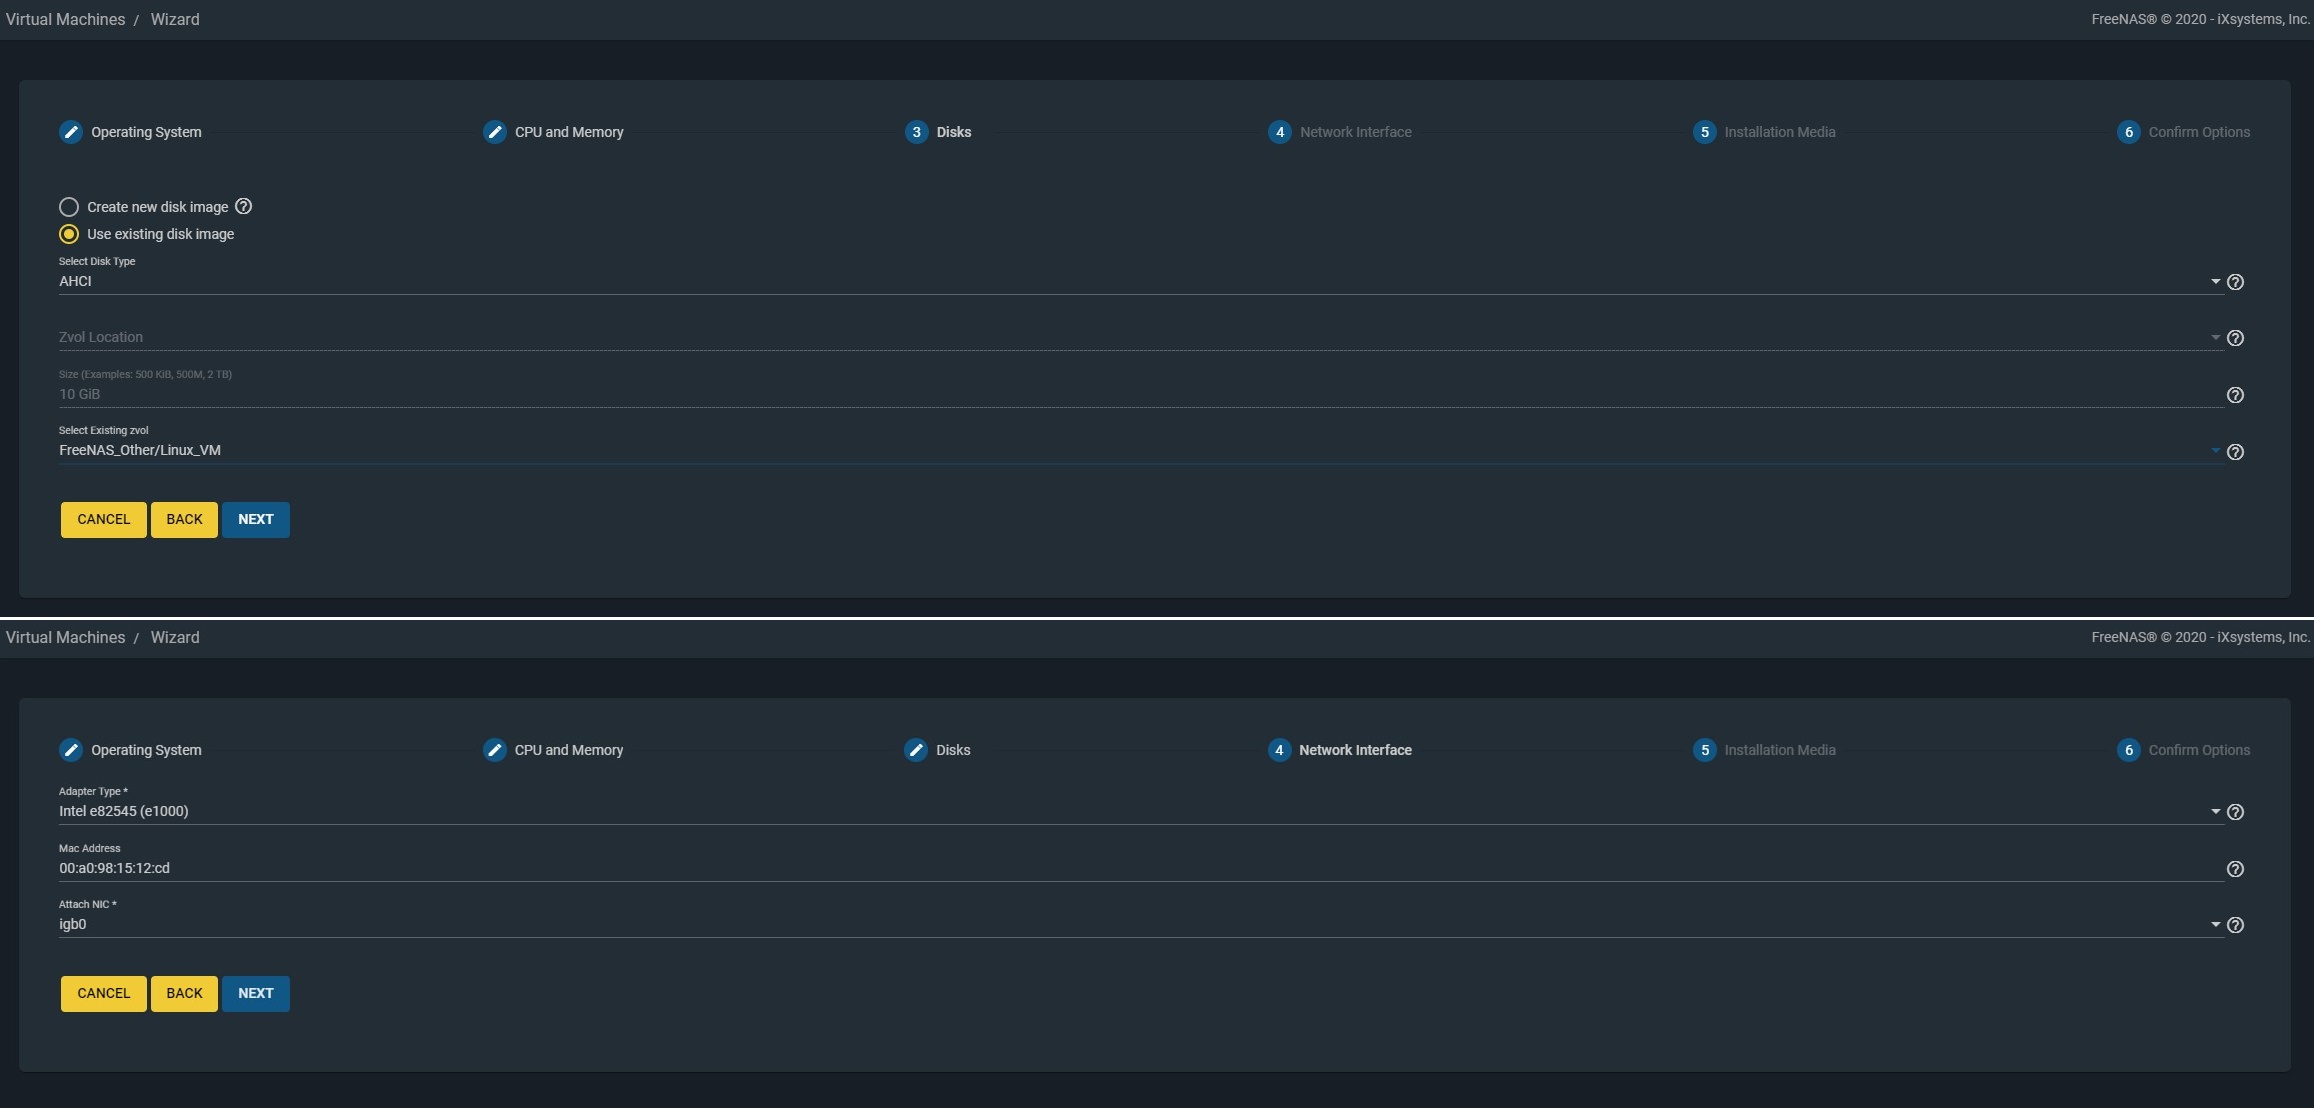
- Select the option to use the existing disk image, and find the previously-created Zvol.
- Leave the virtual network adapter settings as default.
You can also assign an exclusive interface for the VM, if the computer is equipped with multiple network ports or add-in NICs.
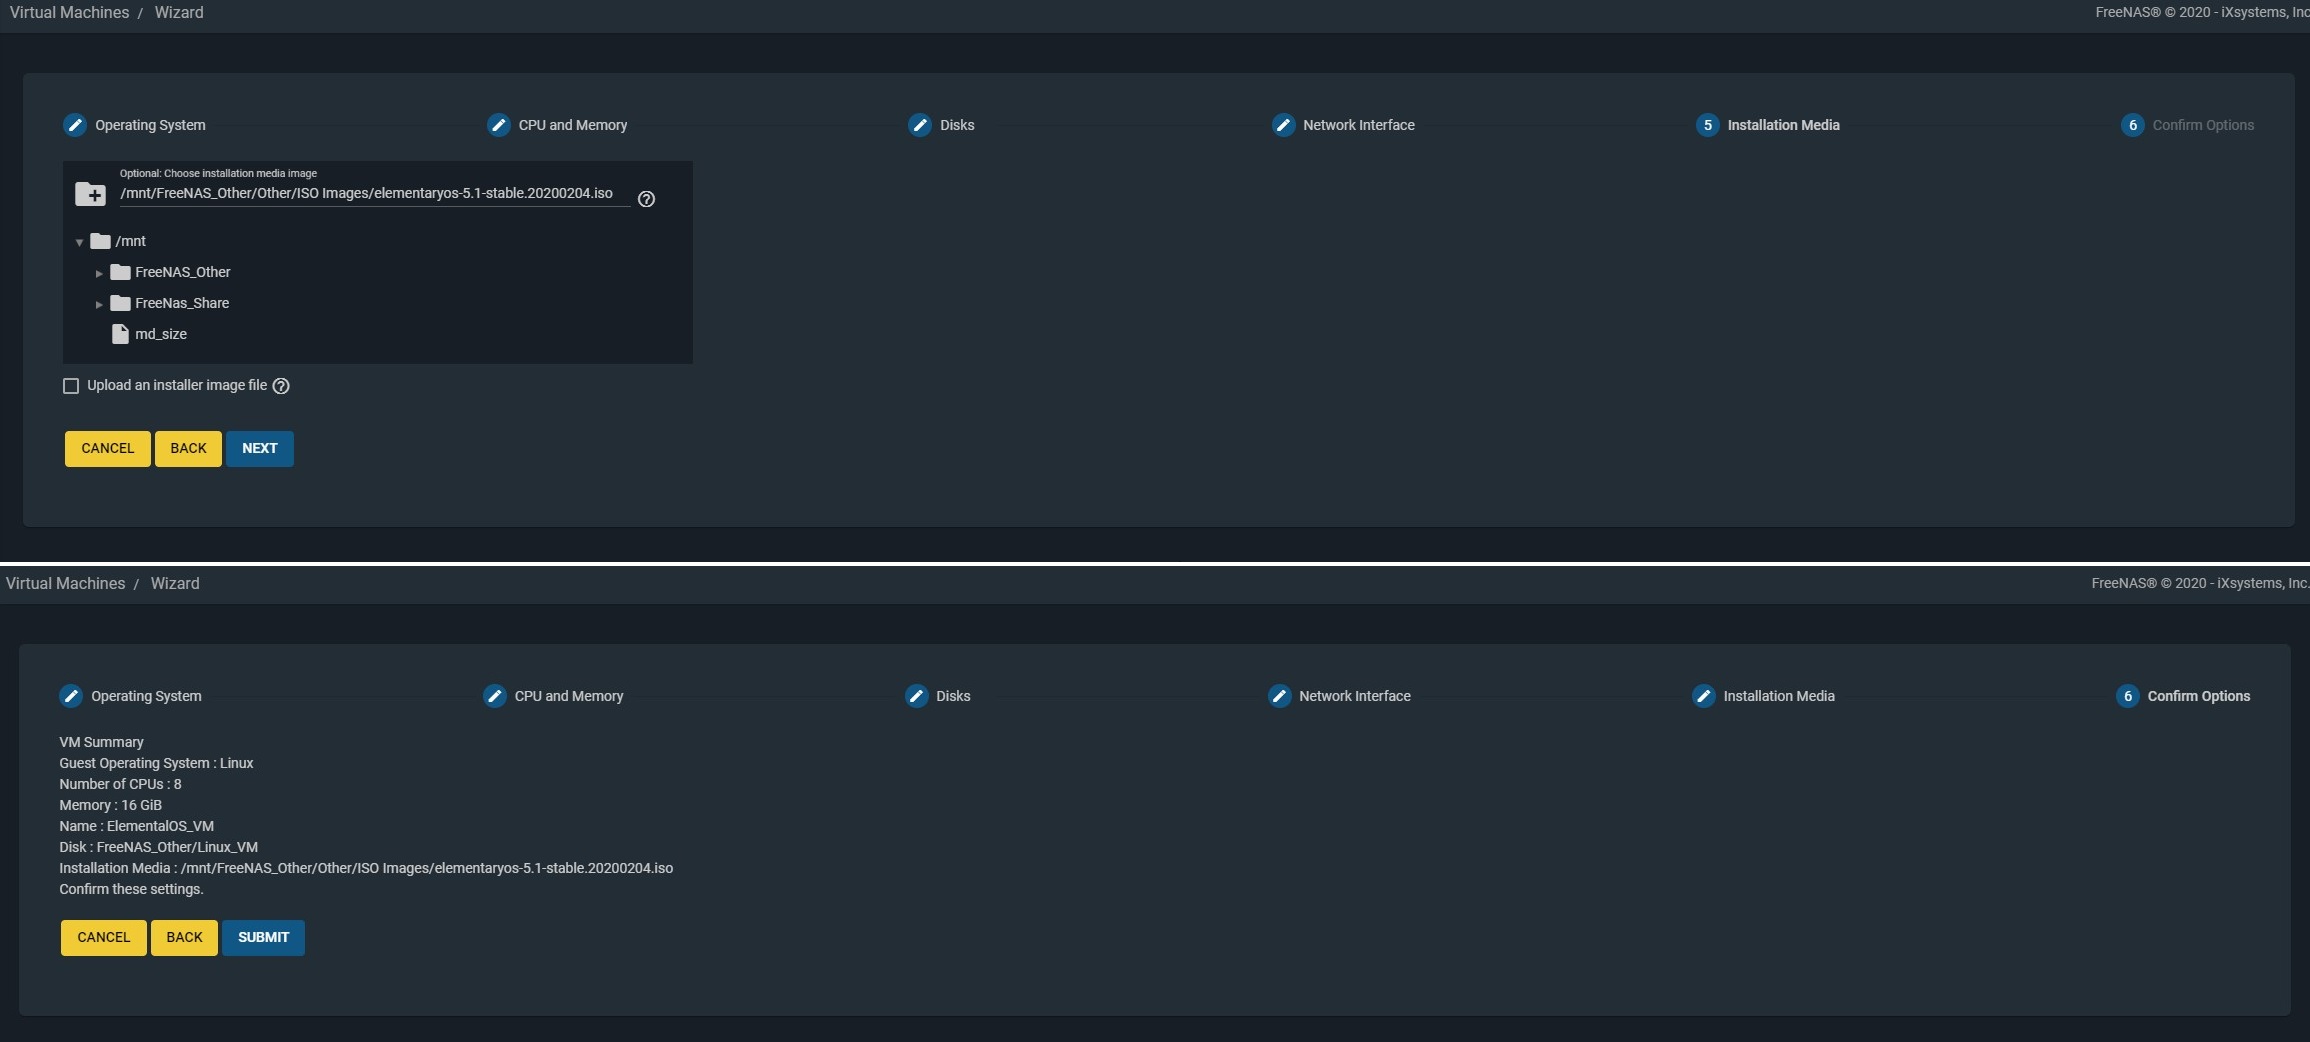
You can either transfer the prepared ISO file to one of the FreeNAS storage pools or directly upload it inside the setup wizard. A full list of the VM configuration will then be shown for confirmation.

Click the toggle switch to start up the virtual machine. You can expand the tab to show more information and options. Hitting the “VNC” button will take you to the web viewer window, that allows you to remotely control and see the graphical output of the VM. Or you can check out our other how-to guide on connecting the VM using a standalone VNC application.

You can proceed with the OS installation like normal, when you start the virtual machine for the first time.
It may not be the most efficient way to operate virtual machines over the network, but it is acceptable for most casual users. It is close to impossible to build a separate VM server in a home and small business environments. Not to mention, it is a waste not to spend the idle resources (CPU cycles and RAM capacity), if you can utilize them in a virtual machine.
Feel free to leave comments below, if you have any opinion about this website. Share the website around if you enjoy reading it. Subscribe to our Newsletter or follow our Twitter, Facebook and Instagram.
Support this website simply by shopping in Amazon and Newegg. It will give us small kickbacks, if you use the above affiliate links to make any purchases, which will help us grow.





Thanks for posting this. I’d be interested in learning how to connect to the VM with a standalone VNC app as well. Can you provide that info? The web-browser-based VNC client seems to run poorly.
Thanks. We will be looking into making another How-to article about the VNC app in the near future.
A new how-to article for connecting the VM in TrueNAS/FreeNAS is published now. (https://www.unbxtech.com/2021/09/howto-vnc-viewer-vm-truenas.html)
This was a delight to read. You show an impressive grasp on this subject! I specialize about Content Writing and you can see my posts here at my blog 94N Keep up the incredible work!